Monday, August 28, 2023

Hemorrhoid Pain Relief Products

 Hemorrhoid pain relief products are designed to alleviate the discomfort and pain associated with hemorrhoids, which are swollen veins in the anal and rectal area. These products can come in various forms, including creams, ointments, wipes, suppositories, and even oral medications. It's important to note that while these products can provide temporary relief, they may not treat the underlying cause of hemorrhoids. Here are some common types of hemorrhoid pain relief products::


1. Topical Creams and Ointments: These products are applied directly to the affected area and often contain ingredients like hydrocortisone, witch hazel, lidocaine, or a combination of these. They can help reduce inflammation, itching, and discomfort.

2. Wipes: Hemorrhoid wipes are pre-moistened wipes that can be used to gently clean the anal area after bowel movements. Some wipes may also contain soothing ingredients to help relieve pain and irritation.

3. Suppositories: Suppositories are inserted into the rectum and are designed to provide relief directly to the affected area. They often contain ingredients like hydrocortisone or astringents that help reduce swelling and discomfort.

4. Oral Pain Relievers: Over-the-counter pain relievers like ibuprofen or acetaminophen can help reduce pain and discomfort associated with hemorrhoids. However, these medications only provide general pain relief and do not target the hemorrhoids directly.

5. Sitz Baths: While not a product in the traditional sense, sitz baths involve sitting in warm water for about 15-20 minutes several times a day. This can help soothe the affected area and promote healing.

6. Homeopathic Remedies: Some people opt for homeopathic or natural remedies such as aloe vera gel, coconut oil, witch hazel compresses, and essential oils like lavender or tea tree oil. It's important to do thorough research and consult a healthcare professional before using these remedies.

7. Lifestyle Changes: In addition to using pain relief products, making certain lifestyle changes can help manage hemorrhoid symptoms. These changes may include increasing fiber intake, staying hydrated, avoiding prolonged sitting, and practicing good hygiene.

It's essential to consult a healthcare professional before using any hemorrhoid pain relief products, especially if you're pregnant, nursing, have underlying health conditions, or are taking other medications. They can provide guidance on the most appropriate treatment for your specific situation and offer advice on managing and preventing hemorrhoids in the future. If your symptoms are severe, persistent, or accompanied by bleeding, it's important to seek medical attention promptly.

Friday, June 26, 2020

How to change the toilet flush valve

If your toilet flush valve is no longer working properly or is leaking, it's time for you to change it. Although plumbing seems to be a job to be left to the experts, you can change your toilet flush valve with minimal effort by following these simple steps.


- How to change toilet flush valve and products
- How to fix toilet flush lever


Part one
Prepare the installation


    one
  •     Turn off the water in the toilet. Before starting any installation, you must turn off the source of the toilet water. Otherwise, water will flood the bathroom.
  •         Usually, the water supply valve is located by the pipes that go from the wall to the inside of the toilet.
  •         Turn off the water by turning the valve clockwise (right) until you feel some resistance.

    two
  •     Remove any water left in the toilet. By pulling the chain you will drain most of the water remaining in the toilet, allowing you to access the internal parts more easily.
  •         This will also prevent any remaining water from spilling out of the toilet bowl and wetting the entire floor.
  •         Absorb the remaining water with a sponge and a bucket.

    3
  •     Remove the tank. The next step is to look at the bottom of the toilet, find the attached hose, the flexible supply connector, and remove it. Then, with an adjustable wrench, remove the nuts and bolts from the hose and raise the tank.
  •         Lift the tank carefully as it will come off the bottom of the toilet.
  •         Flip the tank down and place it on top of the toilet seat.
4
    4
  •     Locate and remove the discharge valve. Locate a thick, tapered rubber stopper and remove it. Under the cap you will see a large plastic nut. Loosen and remove the plastic nut to remove the discharge valve.
  •         Begin to loosen the nut by turning it counterclockwise (left) with the pliers.
  •         The discharge valve will pop out immediately.
  •         Undo the clip (it looks like a paper clip) that attaches the hose by pushing it out. This clip connects the discharge valve to the fill valve.

    5
  •     Clean the surface on both sides of the drain valve. Use Formula 409 cleaner or a similar product and Clorox bleach to clean the surfaces that are in contact with the discharge valve.
  •         This way, you will prevent any residue from interfering with the discharge valve seal, guaranteeing that you will not leak.
  •         To do this, use a rag and cleaning products.

Part two
Change the valve


    one
  •     Install the new valve. You will place the new valve the same way you removed the old one. Take the valve with the threaded side up and slowly pass it through the hole, reaching into the tank. Be careful not to over-secure it or you may cause the tank to crack. [one]
  •         Make sure the black tube, which runs from the top of the new valve, is 1 inch (2.5 cm) below the level of the toilet or clip it to the left side of the toilet tank.
  •         Cut the tube to the correct height before putting the hose on. The manufacturer's instructions specify what the proper height is. For example, with a Fluidmaster 507A / B / D relief valve , you will need to cut the excess pipe at least 1 inch below the hole in the tank where the lever is installed. [2]

    two
  •     Attach the new rubber stopper. Once the discharge valve is in the hole, attach a new thick rubber stopper (which is the same type as the stopper you removed). Then hold the valve steady and replace the lock nut. Screw tight with your hands.

    3
  •     Replace the hose attached to the discharge valve. Replace the hose and attach it to the black plastic tube that runs from the top of the discharge valve.

    4
  •     Put the tank back on the toilet. Turn the tank right side up and carefully place it back on the toilet to avoid damaging any of the newly installed parts.
  •         Put the nuts back in place to fit the tank over the toilet.
  •         If you have purchased a toilet kit, use the new screws that come with it.

    5
    Connect the flap chain.

    6
  •     Replace the supply hose. At this point, you need to reconnect the supply hose at the bottom of the toilet to reestablish the flow of the water. It has a threaded nut made of plastic on the end.
  •         Connect the hose to the fill valve (which looks like a small white tube) by screwing on the nut and screwing it in manually.
  •         Then use a wrench to tighten the nut a quarter turn. Don't adjust it too much.

Part 3
Test and troubleshoot


    one
  •     Make sure the toilet is not leaking. Flush the toilet a few times to check for possible leaks. If the toilet leaks or leaks, it will leak immediately.
  •         With a flashlight, place yourself under the toilet and see if the toilet is leaking.
  •         Identify where the leak occurs. Usually, the water can come from the supply line or from a plug with holes.
  •         Turn off the water to check the conical plug and the coupling of the water supply line.
  •         Check and tighten connections to prevent leaks.

    two
  •     Check and make sure the water rises to the indicated mark. Generally, the water level should reach the same level as the water mark on the inside of the toilet. If the water does not rise to the correct level inside the toilet, adjust the fill valve.
  •         You can adjust the fill valve greatly by moving the entire valve up or down. For minor adjustments, use the fill valve screw.

    3
  •     You should be alert if you hear any hissing or self-discharge sound. If you hear any whistling-like noise or when air escapes from a balloon, then the flap valve (the discharge flap) cannot close properly. Make some adjustments to raise or lower the valve a little. Typically, the flap valve screw is located on the buoy, which is shaped like a small barrel and rises and falls with the water level.
  •         Use a screwdriver to tighten the flap valve screw. Tighten or loosen the screw until you hear no noise.


Wednesday, June 24, 2020

Toilet Flappers

How to change the toilet flap

The toilet lids can wear out over time, or you may want to change it to add a more original and fun. Do you want to know how to change the toilet lid? Keep reading and learn how to change it easily.

- How to replace toilet flappers and products
- How to change toilet flapper

Decorative toilet seat covers
A toilet lid doesn't just change when it's broken or worn. Today there are thousands of truly original designs to give this bathroom element a very interesting decorative touch.

Without a doubt, it is a fantastic opportunity to contribute to the decoration of the bathroom, since there are all kinds of aesthetics to adapt to the decorative style you want to give to that room. Of course, you can always put it completely white again and continue with the classic style of a lifetime.

Steps to change the toilet lid

  1. The first thing you have to do is remove the cap that is on. To do this, remove the screws on the sides and the cover will be loose.
  2. Now remove the cap and clean that area so that the new one sits on a very clean surface and does not acquire the dirt from the one that was before.
  3. To get a new cover, take the measurements you remove, especially the distance between the anchors and the distance from the anchors to the front, with the cover closed. It also measures the width of the lid at its widest point.
  4. Once you have the new cap ready, position it so that the anchors fit the holes and you can fix everything.
  5. Tighten the nuts securely, preferably with the help of a wrench that is likely to come in the new cap package.
  6. When you have pressed lift it and lower it several times to check that it looks good and that there is no problem with it.

Toilet Tank Balls

How to adjust the water level in the toilet tank

The water in the toilet tank is used to flush the toilet bowl. When the toilet bowl is not cleaned during flushing, the fill level of water in the toilet tank should increase. If you feel the need to conserve water, you can choose to lower the water level. A float is installed inside the toilet tank to control this level. When the tank begins to fill after rinsing, the flow of water stops automatically according to a preset level. This is because the float is lifted by the buoyancy of the rising water and closes the water valve through which the water enters the tank. Here we show you how to make adjustments to that water level.

- How to repair toilet tank balls and products
- How to adjust the water level in the toilet tank

Water level too high

Step 1: When the float ball is too high, it allows water to seep into the overflow pipe. To resolve this, bend the float arm slightly to keep the water level one inch below the top of the overflow pipe. Verify that enough water reaches the toilet bowl by flushing it. If not flushing properly, gently adjust the float ball until you have the proper water pressure needed to flush the toilet.

Step 2: A damaged float ball will not rise to close the ball faucet through which the water flows. Using pliers, grasp the float arm and unscrew the float ball counterclockwise. Apply plumber's tape or petroleum jelly to the floating arm threads before attaching a new floating ball.

Water intake assembly

Step 1: If your toilet has a water intake assembly instead of a floating ball, pinch the clip attached to the thin metal rod.

Step 2: Slide the dipstick and attached cup down to lower the water level.

Step 3: To increase the water level, slide the clip with the cup up. Be careful to move the clip about an inch at a time either way.

Metered fill valve

Step 1: If the tank has a metered valve instead of a float, adjust the water level with a screwdriver to turn the knob counterclockwise and lower the water level.

Step 2 - Turn the knob clockwise to increase the water level. Be careful to turn the knob only half way at a time.

Ball dick

The ball faucet opens and closes according to the rise and fall of the float balls and controls the flow of water to the tank. The floating arm pushes the valve plunger and washer to stop the flow of water in the plunger style ball faucet. If it is a diaphragm type ball wrench, the plunger pushes against the rubber diaphragm.

Step 1: Close the water connection to the toilet and flush it.

Step 2: Slide the float arm out of the way so you can reach the assembly. Remove the screws around the ball faucet assembly to reach the washers or diaphragm. Use a small screwdriver to remove the washers from the valve plunger.

Step 3: Clean the sediment inside the ball tap and washer with a little vinegar and a small brush.

Step 4: reassemble the parts after cleaning. If the problem persists even after that, replace the ball valve.


Saturday, June 20, 2020

Sharpening Chainsaw Chain

How to sharpen the chain of a chainsaw
Sharpening the chain of our chainsaw is a maintenance task that we must do often, since the cutting capacity and durability of this will depend largely on how sharp it is.

- How to sharpening chainsaw chain and products
- How to sharpen the chainsaw with file manually


But if you have been with one of them for a short time or simply have never done it, you may have the question of how to sharpen your chainsaw and it is normal, so in this article we want to explain step by step how to sharpen the chain of your chainsaw.

Steps on how to sharpen the chain of a chainsaw correctly and easily

How to sharpen the chainsaw with file manually
Explaining how to sharpen a chainsaw can be tricky. Therefore, before writing the steps to follow, we will include an explanatory video for those who prefer to see it visually instead of reading.

The 10 steps to follow for sharpening chainsaw chain with file:

  • 1. You must determine the size or gauge of your chainsaw chain. First of all you will need to buy a rotary wheel or file to sharpen chainsaw chains which match the chain tooth. You must be especially careful in this, since there are different file diameters.
  • 2. Clean the chain. To do this you can use a solvent, a degreasing detergent or a little gasoline to clean the oil, dirt and particles from the chain. You can use a brush to clean properly.
  • 3. Check each link to see if they are worn or damaged. This step is important as there is some danger in the event that individual teeth are chipped, broken, or bent. As a basic rule, the top of the tooth should be at least 0.6 cm long. If that length is shorter there is a risk that the chain may break when in operation. Therefore it is important to discard the chain in case it is damaged or worn.
  • 4. Place the chainsaw on a stable surface or hold the sword or rapier with an element that allows it to be fixed and prevents movement. It is important that the chainsaw is stable in order to sharpen the chainsaw correctly and safely.
  • 5. Set a main starting blade. For this it is necessary that you mark it with some tied wire or with a marker. This is necessary to have a starting point and not make the mistake of sharpening a tooth twice, which would lead to increased wear.
  • 6. Place the file in the front notch of the blade. We must introduce the file in the tooth gap with a position about 30ยบ, so that it fits perfectly with the front curve of the tooth.
  • 7. Start filing. Slide the file keeping the previous position carefully and taking care that the possible remains of the file fall down to discard them.
  • 8. Perform the procedure with all teeth. Following the guide of the starting point, file all the teeth in that position.
  • 9. Invert the sides of the saw and start sharpening the teeth in the other direction.
  • 10. Check the depth gauges and file them if necessary. These are the hook-shaped links. These should have a difference in height with the top of the cutting teeth of about 0.3 cm to ensure that the teeth work properly. If the distance is less, you should carefully file them with a flat file until you reach the proper height.

Once these steps are done, you just have to lubricate the chain and check the tension of the chain. Once this is reviewed, the chainsaw will be ready for use.

Tuesday, May 5, 2020

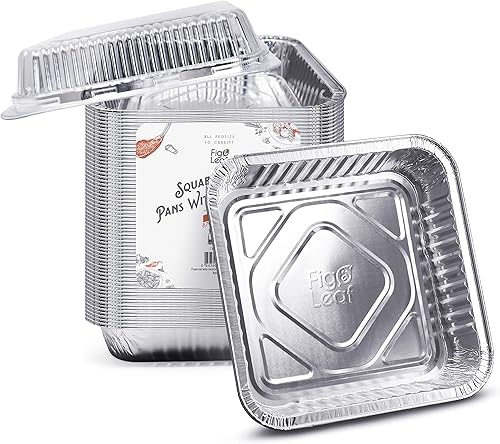
Fig & Leaf (35 Pack) Square Baking Pans with LIDS | Size 8” x 8” | Heavy Duty 32 Gauge l Disposable Aluminum Foil Tins l Portable Food Containers l Top Baker’s Choice for Cake Roasting Oven Toaster

This is the correct way to wash the baking pan, no trace of stains!

Washing the cake pan is one of my worst nightmares, although I enjoy baking and eating the cake afterwards, I hate with all my soul to wash and more when it comes to molds, because with use it becomes more difficult, but I discovered a way to make it very easy.

Fig & Leaf (35 Pack) Square Baking Pans with LIDS | Size 8” x 8” | Heavy Duty 32 Gauge l Disposable Aluminum Foil Tins l Portable Food Containers l Top Baker’s Choice for Cake Roasting Oven Toaster

button

Prepare this red velvet cake and then worry about washing the mold.

Now, if you have problems like me, you should pay close attention. You do not need much effort, time or money, washing will become so common that you will not worry about the mold, it will also be so clean that you will not want to stop using it.

It happened to me!

I understand that with the passage of time the molds begin to wear out and have horrible stripes that make washing something (almost) impossible, but there is a solution and I am not talking about buying a new mold, the one you have will be perfect.

You will need to:

  •     1 tablespoon of baking soda
  •     Atomizer
  •     White vinegar
  •     Brush


With these ingredients, washing cake molds is, seriously, something so easy that you will not believe that it is real and effective.

To make it look like new:

  •     Cover the bottom of the pan with the baking soda
  •     Sprinkle the white vinegar over the baking soda
  •     Carve with the brush and let it rest for a few minutes
  •     Over time, wash like you normally do
  •     Let dry


Now, eat your cake with all the tranquility in the world because washing cake molds is a very simple task from today, don't you think?

Fig & Leaf (35 Pack) Square Baking Pans with LIDS | Size 8” x 8” | Heavy Duty 32 Gauge l Disposable Aluminum Foil Tins l Portable Food Containers l Top Baker’s Choice for Cake Roasting Oven Toaster

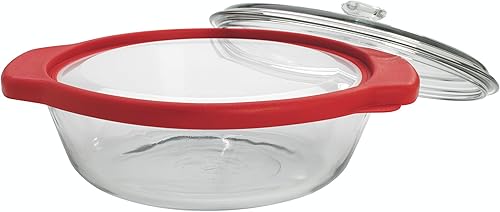
Anchor Hocking TrueFit Bakeware Glass Casserole Dish with Cover and Storage Lid, Cherry, 3-Piece Set

How to clean the oven glass

Whether you make lasagna or casserole, there is always a splash. This can cause food to build up on the oven glass over time. You can make oven glass always look its best by doing routine cleaning, removing stubborn stains and routine maintenance.

Anchor Hocking TrueFit Bakeware Glass Casserole Dish with Cover and Storage Lid, Cherry, 3-Piece Set

button

Method 1 Do a routine cleaning


    one
    Make a baking soda paste. Mix a solution with 3 parts water and 1 part baking soda in a shallow bowl until the baking soda dissolves. The texture will be like that of a thin paste. Open the oven and spread the mixture on the door glass. You can spread it with your fingers on all the corners of the glass. [one]

    2
    Let the baking soda sit in the glass for 15 minutes. The baking soda mixture will begin to loosen the dirt. Set 15 minutes on a stopwatch.
    3
    Rub the glass with the rough side of a sponge. After the baking soda mix has had time to smooth out the door splatters, scrub it with a kitchen sponge. Use the rough side to peel off as much sticky food as possible. [2]
    4
    Rinse with water. Rinse the sponge and remove the baking soda in side-to-side movements. Rinse and squeeze the sponge from time to time until all the baking soda is removed.
    5
    Dry the glass with a clean cloth. Use a clean, dry kitchen cloth to dry the oven door. If there is still any baking soda left, use a damp sponge to clean it off and re-dry those areas. [3]
    6
    Use a glass cleaner to remove stains. To keep the glass shiny and crisp, use a commercial window and glass cleaner, such as Windex, to give the glass one last pass. Spray some of the cleaner on a paper towel and wipe from one side to the other. You don't need to dry again. The oven is now ready to use as usual.


Method 2 Remove tough stains


    one
    Heat the oven to 35 or 50 ° C (100 or 125 ° F). To remove stubborn stains, you should heat the oven to a very low temperature. When the oven has reached this temperature, turn it off and open the door for 1 minute to cool it down a bit. The right temperature will be when you feel the door is warm, but not too hot to the touch. [4]
        Do not heat the oven to more than 50 ° C (125 ° F). If the door gets too hot, you could get burned.
        Food particles that are difficult to remove will soften slightly with heat.
    2
    Spray the warm glass with a suitable oven cleaner. Spray the glass with an oven safe cleaner such as Easy-Off Oven Cleaner or Oven Pride. Use only enough to cover the glass, but not so much that it puddles. Close the door for 5 minutes.
  
    SPECIALIST COUNCIL

    "The easiest way to clean the oven door glass is to spray a special cleaner, let it settle, and then clean it."
    Bridgett Price
    Bridgett Price
    Maid Easy cleaning guru and co-owner

    3
    Rub with a kitchen sponge. Open the oven and rub the glass with a damp kitchen sponge. Make circular movements to better detach the stuck food. When you're done, rinse the area with a clean, damp sponge.
    4
    Dry the glass with a clean cloth. Use a clean, dry kitchen cloth to dry the door. If there are still some sticky food scraps left, scrape them off with a straight razor. [5]

Method 3 Do routine maintenance


    one
    Clean the oven glass once a week. To keep the oven glass looking good, clean it weekly with baking soda. Put a reminder on your calendar to make it a part of your cleaning routine. [6]
    2
    Clean splashes immediately. If the food you prepare splashes in the oven, try to clean it as soon as possible when the glass has cooled. This way, you will prevent stains from baking again, which will make cleaning them much more difficult.

    3
    Use the oven's self-cleaning feature once a month. If your oven has a self-cleaning option, use it once a month to keep it dirt-free. This high temperature will neutralize spatter from the oven and allow you to ensure that the oven functions are ideal.

Things you will need

  •     sodium bicarbonate
  •     Water
  •     dish towel
  •     sponge
  •     oven cleaner
  •     Razor blade

Anchor Hocking TrueFit Bakeware Glass Casserole Dish with Cover and Storage Lid, Cherry, 3-Piece Set