5 tips for successful gratins
How to make a gratin successful?1) Have a very soft gratinSome vegetables make water like tomato or zucchini, while others like eggplant and carrot dry out when cooked. Broth, cream or milk will bring softness to your gratin. To avoid a "soggy" effect, sauté the disgusted vegetables in a pan with a little butter or oil before incorporating them in your gratin. You can also add some vegetables to your traditional gratin to absorb water or even milk powder.
2) Flavor your gratinFor some recipes such as gratin dauphinois, it is highly recommended to rub the sides of your dish with a clove of garlic. You can perfectly generalize this practice to all your savory gratins. Vary the pleasures, and replace the clove of garlic with a shallot, a ginger rhizome ... Spices (nutmeg, paprika, curry ...) added to the bechamel sauce or cream will be appreciated. Finely chopped aromatic herbs, fresh or frozen, can also enhance your dish just before serving.
3) Give it crispIt is essential not to miss out on the crispiness of your gratin. Several solutions are available to you to cover your preparation and obtain a beautiful golden crust: do not skimp on the cheese: grated or cut into small pieces (choose a cheese with more or less character, according to your tastes: emmental, gruyère, Comté, parmesan cheese, goat cheese), or breadcrumbs (homemade or not) or even homemade crumble batter. Sprinkle with butter hazelnuts for a more delicious and colorful touch.
4) Perfectly successful cookingPreheat your oven for 5 min at 180 ° C. Keep this temperature to cook your gratin. The cooking time depends on several factors: if the ingredients are cooked or precooked, 30 minutes will be enough. For uncooked food, opt for 1 hour or more in the case of long-cooked vegetables such as potatoes. Allow 1 hour 15 to 1 hour 30 minutes for a gratin dauphinois for 6/8 people. The larger the size of the dish, the longer the cooking time. In a ramekin or individual casserole dish, allow a reduced time (about 20 min). Be careful, if your gratin browns very quickly, cover it with a sheet of aluminum foil.
Most gratins tolerate freezing very well. To warm it, wait until your gratin is completely thawed at room temperature then place it in your preheated oven. It will only get better.
5) Don't forget the binder, the sauceYour options are numerous: milk (cow, goat, soy, rice ...), crème fraîche (liquid or thick), broth, béchamel ... To add binder to your dish, you can also beat in omelettes 2 or 3 eggs and add them to the vegetables. For a light version, you can perfectly pour light crème fraîche, or fromage blanc or a crème fraîche, yogurt mixture.
Tips:In case you forgot, the gratins allow you to recycle your leftover meats, fish, starchy foods, vegetables as well as your somewhat wilted vegetables and fruits ...
About bread baking
(How to Bake, How to Bake Food, Flour Properties, Pre-sticking, Moisture in Food Bread, Dough Exchange DU, Dough Pads, Sausage, Direct Dough, Indirect Dough Cooking, Burgundy, Dough, Dough Test, Dough Maturation, Lying, Baking, Fermentation, Baking, Baking , the bakery factor)
Bread is divided into food bread and fine bread (= soft cakes, cookies etc.) For fine bread see> How to make fine bread. You can bake white food bread of wheat flour, light of graham flour and mixed flour, dark of rye flour and rye flour mixtures, as well as hard bread of whole grain flour and the like. Read more> Different food breads.
To bake food bread in an old-fashioned way (sourdough bread) you need flour, water and preferably some salt. To bake in the modern way, additive is added (yeast or baking powder). More is not really needed, but you can improve the taste and baking properties with different liquids (milk, fil, beer) or additives (food fat, sugar, vinegar, spices, etc.). The choice of flour type and baking method also gives the bread a varied character, texture and taste.
For a good result, it is important to carefully measure Indians and follow instructions. Baking is an exact "science" compared to cooking that is relative, ie you can do a little as you please.
Bakery terms are tricky to understand for the uninitiated. For explanations see> Baking concept of food bread
Food bread can be baked withSourdough - which is the original way of baking bread, ie without yeast. Then you first have to prepare a dough (leaven ground) that starts the fermentation process. Read more> Then baked bread with sourdough.
Yeast dough ("quick dough") - is the modern way of baking bread ie with yeast. Raspberry is another word for fermentation and rasp paste is a pasta paste that improves baking properties and is sometimes used. Read more> How to make food bread with yeast; Raskdeg.
Baking powder dough ("rush dough") - quick baking, the dough does not need to ferment. Mostly used for fine bread baking, sometimes for food bread eg. scones. Read more> Then baked bread with baking powder.
As a beginner, it is recommended to first bake a baking soda bread - simple, fast and tasty. Then learn how to bake traditional yeast dough bread, first white e.g. mold bread, then light bread, followed by dark yeast bread. Then try to scrape flour and make quick dough. Lastly, you should take the yeast baking, which is the most complicated and the greatest risk of failure. Those who have learned sourdough baking usually become devoted followers.
Content:
- From flour to loaf
- Properties of flour
- Liquid & Dough Pad ("turn on")
- Yeast, fat, salt, sugar & more
- Direct & indirect dough feeding (dough mix)
- The effect of temperature
- Dough maturation, fermentation (rest)
- Dough bump, rounding (kneading)
- Lookup (bread forming)
- Baking and finishing
1. FROM MEAT TO LIMPWeigh> Mix> Rest> Knead> Fermentation> Shape> Bake> Eat
Dough mix (pre-dough and direct dough).
Dough maturity (rest) and dough punching (kneading).
Lookup (bread forming).
Baking (in oven) and aftertreatment.
2. FEATURES CHARACTERISTICSFlour may be wheat, barley, rye, corn, buckwheat, millet, etc. which has different baking characteristics which gives different bread characters.
Ordinary wheat flour (core wheat flour, sifted wheat flour, household wheat flour) is wheat flour painted on the innermost part of the wheat kernel, ie shell and germ root have been sieved away. The term "wheat flour" in recipes is always referred to as sifted wheat flour. The starch content is high (about 70%), rich in gluten-forming proteins which gives good fermentation, ie bread with good volume. There is also organic wheat flour with similar properties, but is extra good for sourdough.
Wheat Flour Special is a finer-grained bread baking flour than core wheat flour that contains more protein. The flour absorbs more water and provides even better dough stability, baking properties. The bread gets good volume even if you mix in coarse components such as bran or crusher. The flour contains vitamins B1, B2, niacin and B6 and the flour processing agent ascorbic acid. There is also Wheat Flour Special with whole grains.
Durum wheat flour is a hard wheat type with extra high protein and gluten content. Mostly used as a blend flour for wheat flour. Used for Italian breads such as focaccia and ciabatta and gives yellow bread, yellow cream and crisp, tasty crust.
Dinkel flour is ground kernels without peel of tinkel wheat. The flour is easily digested and has a higher protein content and a different composition of amino acids than wheat, which gives good baking properties. The flour is popular in health foods. Considered healthy and satisfying and often used for different types of dietary supplements. Dinkel can be used in the same way as regular wheat. It gives the bread a musty and nutty taste and a yellower color.
Wheat flour (whole wheat flour) is ground by whole wheat grains, ie including peel and sprout, in other words a whole wheat flour. Used for food bread, crusts, scones and biscuits. Advantageously mixed with regular wheat flour for better baking ability. Bread baked from graham flour becomes slightly crumbly, which can be remedied by first scalding the flour.
Rough rye flour (whole grain rye flour) is flour of rye in which the whole kernel is included, ie including peel and sprout. If only "rye flour" is said to mean rough rye flour. Rye is chemically similar to wheat, but lacks gluten-forming ability which gives a weight, sticky and crumbly bread. This can be remedied if the flour is first scalded (see> How the flour is scalded) and with the addition of wheat flour.
Organic (coarse) rye flour is available in the trade. It works a little better for "cultivation" of rye sourdough soil because it is not cleaned as carefully as regular rye flour. The fermentation process starts a little better.
Fine rye flour (sifted rye flour, extra fine rye flour, stone ground rye flour) is rye flour where peel and sprouts have been removed. Depending on the particle size, fine and extra fine (stone ground) rye flour is distinguished. The latter is rare in trade.
Oatmeal is called skimmed flour or oatmeal (steamed flour). Used as a blend in bread, but mostly for baking, porridge, mutton and soup.
Barley flour has no good baking ability and is therefore used for bread that does not require high volume, e.g. flatbread. Occurs as a blend flour in wheat flour or raw sieve. Included in the mix flour Four cereals. Otherwise used for porridge and included in peat pallets, and is the usual cereal for beer production.
Other flour of cereals and plants such as buckwheat, millet, rice, soy, tapioca, quinoa, maize and more. used for bread baking. Read more> see respective products.
Bakery flour: The baker can choose from many different flour for different purposes. Read more> Bakery flour.
Loaves, grains, crush and bran are used as a mixture of bread. Read more> See the respective cereals.
Pre-sticking: Starch is found in all plants and can be used as a thickener. Starch has good swelling ability and can bind fluid ("paste for"). Common wheat flour contains 70% starch. Rescue flour is basically just starch. When heated, liquid is absorbed, the surroundings thickening. The process is called "pasting" which occurs, among other things. when scalding flour, when baking bread, in cream and porridge, or when cooking sauces and soups. Pre-sticking and "sticking" are not the same thing, Pre-sticking = water absorption, sticking = sticking together.
Dough exchange (DU): Flour has different water absorption capacity. Wheat flour is high and rye is low. Rye "pastes" less and "pastes", more bunches. Fine-grained (stone-ground) flour and protein-rich flour (wheat flour special) take up more liquid, ie require a little more liquid. "DU" is a measure that describes how much liquid that 100 grams of flour absorbs. If the liquid absorption is 70 grams (ml), the dough exchange will be 170. High dough yield gives airy bread, low dough exchange requires longer fermentation time as compensation. The absorption capacity of the flour can be improved by scalding (see below), which is therefore suitable for e.g. rye flour.
Soaking grain and crush in water 30-50ºC = better baking effect
Whole grains (sprouts) and cut (crush) should be soaked several hours before use, usually overnight. This is to soften them for better baking effect and to become more digestible. Soaking is done in water temperature 30-50ºC. No higher, because then the starch begins to paste because the enzymes of the barley break down the starch. Soaking can be accelerated with dough acid.
Flour should be aerated (sieved) before use, it must not be compact. The home baker pours the flour into a measure that must not be shaken.
Grams or liters? Bakers always use grams as a unit of measure because it gives accurate quantities. It is often easier to measure than to weigh, which is especially true of flour. Quantity in liters should always be streaked dimensions of airy flour, not packed. Flour weighs differently. Conversion dimensions from grams to liters are given for each type of flour in the Trade Facts, eg. 1 kg wheat flour = 1.65 liters (1 liter = 600 grams).
3. LIQUID & DOUBLE SPRAY ("ADDITION")Water, milk, film milk, yogurt, beer or soft drink are used for dough pads and give the bread a varied character.
Water is used for white bread to get a crispy crust. The encroachment is often a little tough. Example: Baguette.
Milk gives a rich bread with soft crust. The encroachment becomes fine pore. Example: French bread.
Film milk and yogurt provide full, slightly acidic taste. The best is half water, half film milk or yogurt.
Beer, porter, weak drink, wort gives full, musty taste. Replaces whole or part liquid.
Surcharge: The dough liquid or the dough (see below) that is added to flour during dough mixing calls the baker "sealing".
4. YEAST, FAT, SALT, SUGAR & OTHERYeast: There is fresh yeast and dry yeast, for food bread baking (Crown Yeast original) and Crown Yeast for sweet pastries. Read more> Yeast. The dry yeast is mixed into the flour. Amount of yeast affects bedtime. Norm: With 50 g of yeast in 5 parts of liquid, the bread is fermented in about 30 minutes. With half the amount of yeast in the same liquid, the yeast time is doubled, but gives the bread more flavor.
Food fat is not needed, but works in small quantities as a consistency sensor and makes the bread more even. The bread is also juicier and more durable. However, a lot of fat inhibits fermentation and makes the bread crumbly. Among other things, baking powder is therefore used in (fat) cookies. Olive oil makes the breadcrumbs "shorter", tougher. A bread that contains a lot of fat is brioche, which requires special preparation. See recipe> Brioche.
Salt gives the bread a taste, better volume and more even cream. The dough becomes easier to process.
Sugar, syrup and honey are not necessary, but in small quantities the fermentation becomes more even and goes faster. The bread becomes juicy, the surface browns and the bread stays longer. However, a lot of sugar inhibits fermentation. Therefore baking powder is used in (sweet) cookies.
All kinds of spices, nuts, seeds, dried fruits etc give taste. Fits best in darker bread.
Acetic acid (vinegar) improves the baking ability of whole grains and rye flour, enhances rye flavor and gives a sour taste. Fermented doughs which form acid become acidic, which improves the baking properties of the dough. Amount of vinegar when added is usually 1/2 tbsp per 5 dl water.
5. DIRECT & INDIRECT DEGRADING (DEG MIX)Mixing (dough feeding, removing): Mixing ingredients for dough calls the baker dough feeding or removal. Flour is mixed directly ("direct dough") or indirectly where a pre-prepared "dough" is added to the dough pad. As a pastry is counted sourdough ground, quick dough and scalded flour. Direct dough cooking is the usual baking method for the home baker and if the bakery's bread is perceived as better, it may be because he bakes with dough. The baker "kneads" (mixes) the dough into the "trough" (dough machine). We others may use the bowl and hand power if we do not have a housekeeping assistant.
Direct dough feeding: Fresh yeast (crumbled in a bowl) is stirred properly ("slurried") with heated liquid. Dry yeast is mixed with the flour or slurried in warmer water. Other ingredients are added and mixed with the dough liquid.
Pre-dough is prepared in advance which is later used as an additive in the dough pad. Forage dough gives better dough properties. Pastry can be sourdough ground, quick dough and scalded flour.
Sourdough (dough) for sourdough bread: A sourdough is created from flour and water which are made to ferment using the natural bacteria in the environment, which takes about a week. Read more> Acid soil.
Fast dough (dough) for white and light food bread: Room-warm water, flour and yeast are mixed to a loose batter and allowed to "cover" in the fridge, usually overnight the night before baking. A quick dough is often used when you want to help the yeast on the stack to get started fermenting, among other things in very sweet and greasy doughs. The quick dough then makes up about 1/3 of the dough. Read more> Quick day.
Scalding (dough) is mainly made into coarser food bread, or sourdough of rye and rye mixtures which have low dough yield (water absorption capacity). Scalding means that hot water is poured over flour which mixes well into a tough, sticky mass. Scalding gives high dough yield (binds more water) without getting sticky. The bread becomes juicy, more elastic and more durable. Read more> How to flour flour.
Dough Mixing: When dough is processed, air is mixed into small bubbles to be enclosed by doughy dough during baking to make the bread airy. Wheat dough is mixed until the dough releases from the edges of the vessel. Rye flour swells slowly and the dough has to be mixed for a longer time and in the machine at lower rpm. Rough dough always feels slightly sticky. The dough should be mixed well and a common mistake of the unskilled is to mix too little. Experience is required to determine whether the dough is ready.
Dough sample wheat dough: The baker checks the dough by taking a piece of the dough during kneading, which is flattened and stretched between the fingers to a thin film. The membrane should be flexible and resilient. If it is soft, the bread flows out during fermentation and baking, the bread becomes flat. If the membrane is instead stiff and flawed, the bread gets poor volume and and cracks.
Dough test wheat / raw dough: The dough must not be sticky but offer some resistance.
Dough Sample Rough Dough: Rough dough almost always feels sticky, even when the dough is stiff and compact. Scalded dough and sourdough can be less sticky.
6. IMPACT OF TEMPERATUREThe different temperatures of the flour, liquid and utensils have a bearing on the baking result. Flour and utensils should usually maintain room temperature before cooking.
The bakery factor is a measure of how the dough temperature is affected by various factors e.g. in mechanical machining, of the heat in the room, etc. that the bakers use.
Yeast temperature: Too hot liquid damages yeast, which dies around 45 ° C. The best liquid temperature when mixing fresh yeast is 28-38 ° C and should never be above 40 ° C ("finger warm"). The bakery recipe often states 40 ° C, but then it is expected that the temperature drops 2-3 degrees when the liquid is poured into the mixing tray. Dry yeast is mixed in the flour and then the dough liquid should maintain a higher temperature (45-50 ° C), since the flour cools down the liquid.
Dough temperature: Ideal dough temperature in fermentation dough is 25 ° C, which is regulated by the liquid temperature. The baker adjusts the liquid temperature according to the thumb rule below so that the correct dough temperature is achieved. For accurate calculation, the numbers must also be weighted with the ingredients' weight percentages (for this there are weight tables).
Direct dough feeding: The desired temperature (25) is multiplied by 2 = 50. 23 ° C = 27 ° C, which is the temperature that the liquid should keep when mixed with the flour in order for the dough temperature to reach 25 ° C. For the home baker, the previously finger-hot liquid should cool slightly, but not get too cold before flour mixing.
If quick dough is added to the dough paddle: The desired temperature (25) is multiplied by 3 = 75. 23 ° C and the temperature of the fast dough e.g. 15 ° C ie 75-23-15 = 37 ° C which is the temperature the liquid should hold.
Baking temperature: Bread should not be baked, which is done in high heat. Limp norm: First for a while at 240-250 ° C, which after about 5 minutes is lowered to 200-220 ° C. As the temperature rises in the dough, the pores expand which raises the bread and some gases ("nausea") are released. Gradually, the egg white coagulates (solidifies) in the dough, the starch cells absorb moisture (pastes) and the curd solidifies and turns into bread. Dry crust is formed. The temperature of the finished bread should be 96-98 ° C, which can be controlled with a roasting thermometer.
7. DOUBLE MATERIAL, FermentationAfter mixing, the dough should rest (mature), then be kneaded and kneaded and rest again to ferment completely.
Dough maturity (rest): When the dough is mixed it should rest. It is a maturation process where the aroma develops. Work the dough into pillows on a floured surface. Cover with damp towel, back cloth or plastic ham to prevent "crust" from forming (dry dough surface) and to protect against draft.
The fermentation process is regulated by the amount of yeast, amount of nutrients (sugars), temperature and time. When flour is mixed with liquid, the flour's proteins form a fine mesh of gluten threads. The grid holds the gas that is formed during fermentation. Gluten-rich flour (wheat flour) ferments better than gluten-low (rye flour). During the fermentation, the yeast consumes sugar and produces alcohol and carbon dioxide (which expands the dough). Flavoring agents are formed which give good taste. If the dough is unsweetened, the yeast first breaks down the flour's starch into sugar. With a little sugar or syrup in the dough, the dough will ferment faster without getting sweet. However, a lot of sugar inhibits fermentation. The dough is best fermented at room temperature 20-25ºC. The fermentation should preferably not be completed before the dough has reached full maturity. During bedtime, some water is sucked up, which gives the dough a dry and glossy surface which shows that the dough has matured. You do not tolerate their own gases when it is fermented for a while and ferment better after being ejected (kneaded).
Bedtime includes rest before and after dough bumping (see below). The time varies depending on bread type, yeast quantity, baking method, etc. The room temperature is very important and what you are used to in the summer may not apply in the winter. Normally, white bread laying time is about one hour, half the time before kneading and the rest after. For coarse dark bread twice the fermentation time. During the first fermentation a normal dough swells to double size and after the second almost equal. Other (shorter) times apply to the professional baker. The coarser the flour used, the longer the lying time. Whole grain and rye flour dough as well as sourdough need to ferment longer than wheat flour dough, usually twice as long (1 + 1 hour) or longer. Excessive bed time will cause the dough to shrink and the surface to "tear", the pore walls will thicken and the bread will have less volume. Baking soda bread usually needs no rest at all, but is baked directly in the oven after mixing. Such bread is sometimes called "haste bread".
8. DOUBLE SUPPORT, CIRCULATIONDough casting (kneading): When the dough is fermented at room temperature, acetic acid is formed which is fermentation inhibitor. In the case of dough punching, most of it is removed. A small portion remains which gives taste. The impact also causes the temperature of the dough to be evened out, the yeast nutrients spread to the cells and new yeast pores appear instead of the punctured ones, and the removal of excess carbonic acid and new air is added. Punching of dough occurs more for bread with protein-rich flour such as wheat flour in e.g. French bread.
The dough is kneaded one or more times during bedtime and flattened with hands held together to increase pressure. The dough is pressed out and the edges are folded in towards the middle so that a pillow is formed and reworked. The more kneading, the more elastic the bread becomes. When the dough is finished, a folded joint / line ("the work") should have been formed in the middle of the "cushion". Turn the dough so that the joint comes down. This gives the gluten of the dough increased stretchability. After dough punching, the bread should rest again according to the remaining bed time, to ferment completely.
9. STORAGEWhen the dough is finished, it should be formed into pieces of bread and finished before baking in the oven.
Rounding: The dough is formed into a string and is split with a knife into pieces of bread. Then, the dough is pressed out a few times and rounded (rolled) with cupped hand to smooth, round, tense buns. The professional driver in each hand supported against the table, two buns facing each other outwards and inwards. The dough should be firm (dry) against the back table. Allow the buns to rest for about 5 minutes with the joint upwards on a lightly floured table. Cover with damp towel / back cloth or plastic ham. The circular drive creates a tension in the dough that releases after a few minutes of rest.
Leaching means that the buns are given the shape the bread should have. When the baker makes mold bread, he flattens the dough to a rectangular shape a little longer than the bread mold, after which one edge is folded in towards the middle and the other side is folded in half over the first. Then fold the whole dough in the middle and press together firmly. The dough ("the liver") is then laid on a greased plate or printed in a greased form with the joint down in the middle.
Slicing: Bread should be dotted with a fork or cut with a knife to relieve pressure so that the bread does not crack when baking. Make a maximum of three quick longitudinal cuts with sharp knife lightly across the surface. Excessive cuts can damage fermentation. Cutting is best done before baking.
Topping (garnish): Bread can be garnished with poppy, sesame or other seeds, coarse salt, sugar, chopped almonds or nuts, grated cheese, bran, coarse flour and all kinds of spices. The dough is rolled / moistened with a wet towel before final pouring and turned in topping. Alternatively brush with water and sprinkle on garnish which is pressed to light.
9. BREAKDOWNBaking: When the dough has matured and reached sufficient volume of fermentation it is too dax for "baking". Bread should not be dried but baked, which is done in high heat. Norm for loaf: First at 240-250 ° C for about 5 minutes which is then lowered to 200-220 ° C. One simplification is that e.g. bake at 225 ° C. Some breads are baked in lower heat 175-200 ° C.
Baking time varies, normally 30-60 minutes. The bread is ready at 96-98 ° C, which can be measured with an oven thermometer. An old-fashioned way to check if the bread is baked is to turn it over and tap the knuckle to the bottom, which will then emit a hollow sound.
Crust formation (luster gloss): Without moisture no crust formation (adhesive) on the surface. Moisture can be supplied by steam which the baker does in a special oven, or brushing the surface with water 5 minutes before baking is complete. You can also spray using a flower spray. Sweet limbs do not get a hard surface due to the sugar content. Certain bread becomes tough with steam e.g. crumpets. With a boil of syrup or sugar syrup, the bread surface can be brushed immediately after extraction from the oven, but the crust will usually become sticky.
Baking process: As the temperature rises in the dough, the pressure in the enclosed dough gas increases, the bread expands / raises. Some gas disappears from the bread. The egg whites coagulate, moisture is released, the bread is pasted and solidifies. At 35-40 ° C the yeast's sugar consumption increases and at 50-60 ° C the bread volume increases and the yeast cells die. At 60-80 ° C, gluten solidifies and releases moisture and the starch is glued. At 100-120 ° C water vapor is emitted and the crust (crust) gets light brown in color (dextrin effect). At 140-150 ° C, sugar is converted into caramel and the bread surface begins to turn dark brown. Over 150 ° C, bread is charred and turns black.
Post-processing: After baking, the bread should cool. Bread in shape is allowed to rest in the mold for a short time before being ejected. Release the edges with a knife if the bread is stuck. Preferably place the bread on (oven) grill and cover with dry towel or back cloth. Rough bread and bread high content of whole grains becomes the best after a day's ripening. White bread should be consumed immediately.
Moisturizing food bread: Soft bread should have a moisture content of 35-45% to be tasty. A drier environment means that moisture evaporates and the bread dries out. A more humid environment makes the bread softer. Bags contain and retain moisture. Bread with crispy crust should not be packaged airtight so that the bread moisture softens the crust.
Fresh and old bread, shelf life: The bread is fresh when freshly baked. It is sometimes said that the bread is freshly baked which has no significance. A bread can be fresh even if it is baked from "old" flour, according to a decision in 1998. As the bread ages, it loses its elasticity, the curd becomes firmer and harder, which also happens in airtight packaging. The starch in the bread crystallizes. Rough bread is aging more slowly. Aging takes place more slowly in low temperatures. An old bread can be "freshened up" in heat if the water content is at least 30%, e.g. buns in oven or toaster. The shelf life can be extended if bread is packaged in carbon dioxide gas instead of air, which e.g. is made industrially for half baked white bread, soft cakes and muffins.
Mold: Freshly baked bread is largely sterile. It molds it depends on the surroundings. Previously molded bread e.g. in a bread box, the mold spreads to the next bread via the box if it is not cleaned. Moisture and heat increase mold spread and growth. So store bread dry, but not too hot and in clean packages.
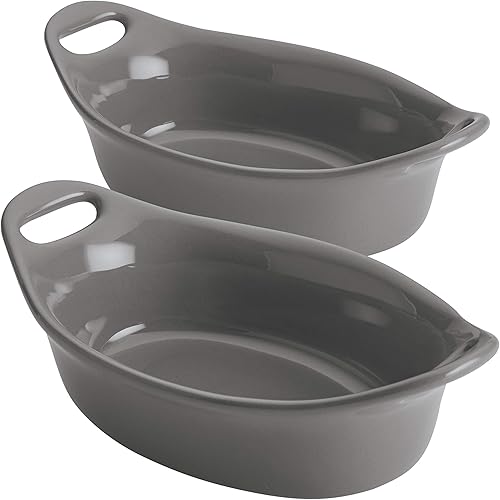
Rachael Ray Solid Glaze Ceramics Au Gratin Bakeware / Baker Set, Oval - 2 Piece, Gray